

How To Use Filters To Take Waterfall Pic
I am e'er drawn to water with my landscape photography, and there is no effectively sight than a regal waterfall tumbling over rocks. Watching tonnes of water plunging into the abyss is one of the all-time experiences in nature. Trying to photograph waterfalls and capture their essence, though, is much harder than first idea.
Withal, as photographers nosotros love a challenge. With the assist of a few pointers in this guide, yous tin arroyo waterfalls in a new way – hopefully coming away with some memorable images.


Keeping things dry
Showtime things first, as with whatever photographic outing y'all volition demand to be gear up for all eventualities. By being well-prepared with some protective kit, you and your equipment can remain dry during your photoshoot.
Waterfalls are notorious for producing lots of spray in the air. Even standing near the foot of relatively calm autumn can result in spray covering your lens, filters, camera, and yourself. There is nothing more annoying than out of focus water aerosol in your images come processing time.
To combat this, a few handy items you should have on every waterfall photography shoot are:
- Bring a waterproof jacket & over trousers. Also, a peaked cap tin work well providing encompass from rain/drips.
- Waterproof photographic camera bag cover. Not but to protect from rain or spray, simply when placing downwardly on sodden ground.
- Wear wellingtons with a good sole and, if you lot have them, micro-spikes for extra traction can work well. Wellies will give you the option to be more experimental with your composition, perhaps in the water itself should it be calm and condom enough.
- Bring plenty of lens cloths and a towel to dry your lens/filters and camera before putting it pocketbook in your dry handbag.
- Although cumbersome, umbrellas can work well by shielding y'all and the camera in between shots – especially useful if it has been raining and water is dripping off copse.

Prophylactic advice
Ever be rubber near water. Never venture into fast moving water, or venture into h2o you lot practice not know the depth of. Accept exceedingly small steps near waterfalls, and presume every surface is like ice – tread advisedly.
Ever keep your hands free; do not walk around with one hand property a tripod and camera as you could throw yourself off-balance, causing an accident.
Proceed all zips shut on trousers, coats, jackets, camera bag etc. then that you do not lose annihilation in the h2o.
Tiptop tips for waterfall photography
1. Avoid the sky
More often than not, I would e'er endeavor to photograph waterfalls on overcast days. It creates global illumination, lighting the scene evenly. While strong sunlight tin create some groovy effects (eg. rainbows or backlit rays through the spray), it is a lot harder to control the overall exposure throughout the paradigm.
On most occasions, falling water appears white. So, if yous are trying to expose for the dark shadows of the surrounding scene equally well as these bright white highlights, information technology is going to exist very problematic to go it right in photographic camera.

In these clouded situations, if possible try to exclude whatever of the sky from your compositions. This area will tend to blow out (overexpose). Even if you do manage to retain sky detail past underexposing or exposure blending, it'll still create an unattractive brighter shape that merely won't sit right with the overall lushness of the falls and its surround.
Shooting tight will help to brand a much more than intimate scene, dedicating the frame to what is all-time about that limerick and location.
ii. Seasons
From a small trickle on a summertime's day to a raging torrent in autumn and wintertime, waterfalls take on different moods and looks all throughout the year. Even on the same day, heavy rainfall tin can transform a waterfall inside a few hours: water levels rise and the h2o takes on a brown colour.
Time your visits to get the blazon of image yous desire, but also remember to visit the same location on more than than one occasion throughout the yr.
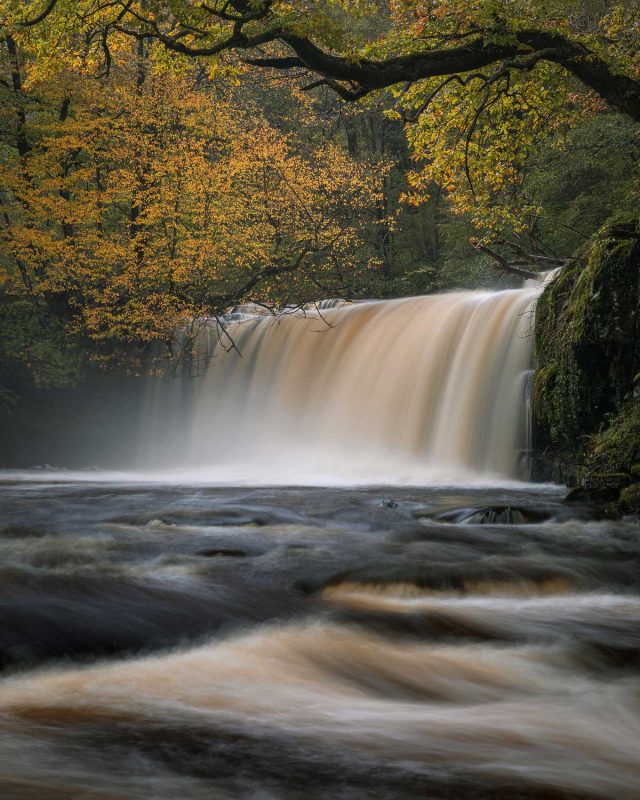
Depending on the water levels, certain compositions at a location are accessible. Or, on the other hand, they get covered over when the river is in spate.
Visit in wintertime and, if conditions allow, y'all may even find the falls frozen, with large icicles providing hitting elements. So, being flexible with your visits will allow you to get the most out of any location.

3. Composition
Limerick is fundamental to skilful waterfall photography. Factors such as using natural elements to convey depth or use connecting lines work well. Use elements like the natural shape of the river; you lot can join the foreground towards the main focal bespeak in the scene.
Read more than: Limerick in Landscape Photography – The Essential Guide
Here are a few ideas for you to try:
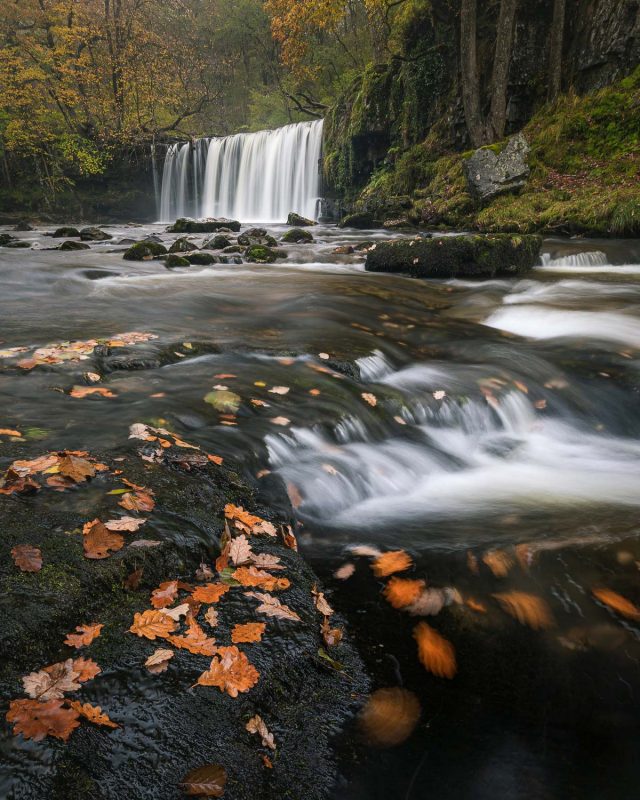
- Use prominent foreground subjects, such as a big mossy boulder or fallen leaves, to add some impact and scale to your images.
- In shallow, calm rivers at the base of waterfalls, shoot from a low position just higher up the rushing h2o for a unique perspective.
- The falling water volition exist the brightest part of the paradigm that your eye is drawn to, so remember to have some breathing space around it. Keep a good margin either side of the falls.
- Scout for leading lines to have the eye through the image, with the path ending at the falls. Try information technology with a fallen log, a serial of smaller rocks, or fifty-fifty the blurred and sweeping lines made by h2o bubbles on a long exposure. They are all an constructive way of creating a journey for the eye.
- Likewise look for copse or natural elements which can frame the waterfall or, at the very least, assistance direct the eye to the falls.

Be sure to use a practiced, sturdy tripod for all your waterfall images. Not only will it provide a solid base if we later decide to utilise a long exposure (wearisome shutter speed), only information technology will also dull you downwards. This allows time to frame your images correctly and with precision.

Camera settings for photographing waterfalls
i. Image aesthetics
The main affair you can alter in whatsoever waterfall photo is how the water appears, and the only controlling factor for this is shutter speed.
This could be using a fast shutter speed to freeze splashes, or a long shutter speed to mistiness any movement. There is no firm rule here when it comes to the perfect shutter speed, and information technology is totally downward to how much h2o in that location is in the scene, how fast it is moving on the day, and also – more importantly – how you want it to expect.
Experiment with your shutter speed to create your desired effect. Other settings, such as aperture and ISO, will aid balance the exposure and determine what shutter speeds yous tin can utilize with the given ambient light.

2. Discontinuity and ISO
Put your ISO equally low as it can get to beginning with – usually around 100 is a good starting point. Nosotros do this for maximum quality and, in well-nigh cases, capture the full dynamic range of the sensor at this value.
Use a narrow aperture (high f-number) to give you a large depth of field, and then focus roughly a third into the scene for good front-to-dorsum sharpness.
Read more: Where to Focus in a Landscape Photo
Dropping the ISO and narrowing the discontinuity will also reduce the amount of light entering your sensor. In turn, this volition slow your shutter speed enough to, hopefully, blur the water.

3. Neutral density filters
Slotting or screwing in a neutral density (ND) filter volition assist to block lite intake, thus extending the shutter speed. These are the easiest way to obtain any shutter speed you wish, and these filters come in different options of density strengths known equally stops.
The near popular choice of ND I would recommend for waterfalls is a 3-finish (0.nine) ND filter, although you can get much higher versions right upwardly to the 10-stop (3.0) filters that will allow yous to shoot well over thirty second exposures in the midday sunday.
However, for well-nigh scenarios I use a 6-stop (1.8) filter, which should give you a twenty-30 2d shutter speed in brighter conditions.

Think, with waterfalls the longer the shutter speed, the more blurred or 'milky' the water can wait. Utilize as well long a shutter speed and the water starts to lose its energy and appeal. Conversely, a shutter speed too short and the h2o tin can get 'messy' – then at that place is a existent happy medium. This is all totally subjective though, so play effectually and experiment for your desired effect and observe what you like.
Likewise, keep in mind that water falling naturally causes localised breezes and air current near its base. Consequently, if you lot have a plant or blossom as your foreground subject, and so the slightest motion will cause it to mistiness throughout the exposure. Take this into business relationship when choosing your shutter speeds.
4. Polarising filters
If I could have just one filter in my camera bag it would exist one of these. A real house favourite of mine is a circular polarising filter, especially when there is a waterfall in the frame. Used in forepart of the lens and rotating for best issue, they tin cut downwardly whatever surface reflections and heave natural colours.
Read more than: What are the Best Filters for Landscape Photography?

A polariser reduces reflected glare from wet rocks, shiny leaves, and water highlights. Information technology also increases color saturation. They as well human action like a neutral density filter, blocking the incoming light by 1-2 stops and hence increasing shutter speed length to blur whatsoever water movement.
Sometimes a polariser is the only filter needed when photographing waterfalls. Put one of these on offset without any ND filters to see if information technology provides the desired shutter speeds.

Waterfall photography checklist
- Using a sturdy tripod for long exposure photography is essential
- Use a cablevision release/self-timer to reduce photographic camera milk shake
- Utilize Manual style
- Set your camera to ISO 100
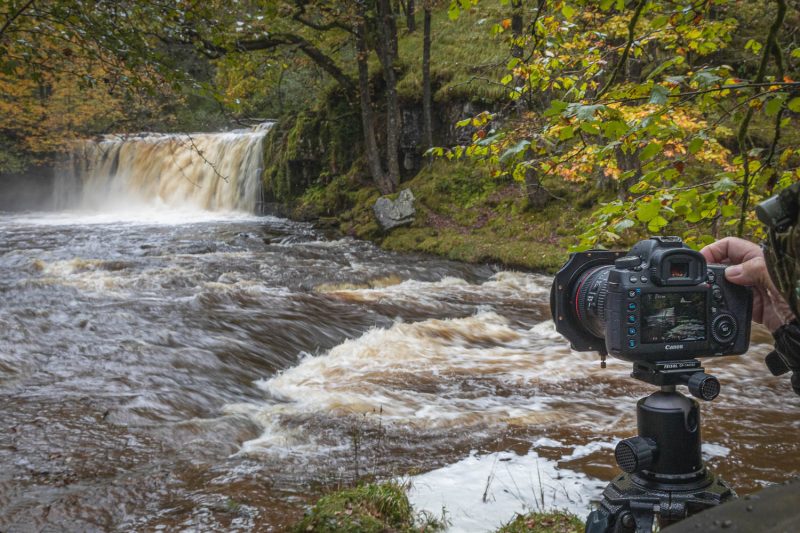
- Compose your shot so without filters on (you will not be able to focus effectively through the viewfinder with a heavy ND filter in place)
- Choose the aperture and then gear up the focus point
- Attach your polarising filter and rotate for best effect
- Set the shutter speed so it is a counterbalanced exposure – employ the histogram to help
- Take a photo every bit a test shot to check the composition and exposure length
- Change your shutter speed to become the desired effect yous are after. If requiring a longer shutter speed, adhere your chosen ND filter
- Take your photograph and review the results
- Always employ the histogram while reviewing images to check for diddled out highlights. You want the histogram limit to be right on the border of clipping the brightest white on the waterfall. There will be some room for highlight recovery if shooting raw
- I also find information technology useful to use Alive View or an EVF to help 'see' through more dense ND filters – speeding up operational time, aiding composition, and gauging exposure accurateness
- Always check your lens and filters for waterfall spray, wiping between shots

In conclusion
Photographing waterfalls can exist challenging. Not only are we photographing something that is always changing, but the fact you demand to approach them with care and respect should instil some caution.
It's also hard to envisage the desired effect of how shutter speeds will touch on the water in a scene until you've taken it, simply with enough of practice and help from pointers in this article, yous should be well on your fashion to taking compelling and interesting waterfall images.

How To Use Filters To Take Waterfall Pic,
Source: https://www.naturettl.com/how-to-photograph-waterfalls/
Posted by: callenderrobef1979.blogspot.com
0 Response to "How To Use Filters To Take Waterfall Pic"
Post a Comment